Turorial - Understanding pods and basic concepts of Kubernetes resources

1. Objective
The goal of this tutorial is to understand a first resource in Kubernetes, the simplest one: a Pod.
Through this tutorial will also be introduced concepts also applicable to any resource in Kubernetes.
This tutorial directly uses a subset of the examples of the book “Kubernetes in action” written by Marko Lukša. All examples of the book can be found here.
2. First application through command line and dashboard
> kubectl run kubia --image=luksa/kubia --port=8080
> kubectl get pods
NAME READY STATUS RESTARTS AGE
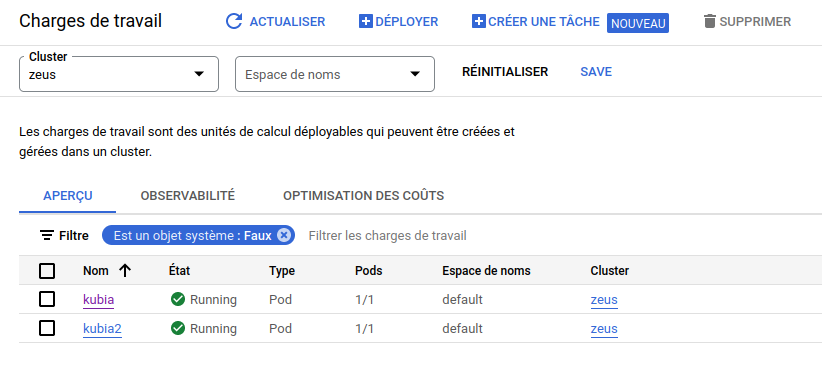
kubia 1/1 Running 0 4m35sGo to the dashboard to charge de travail (workload)
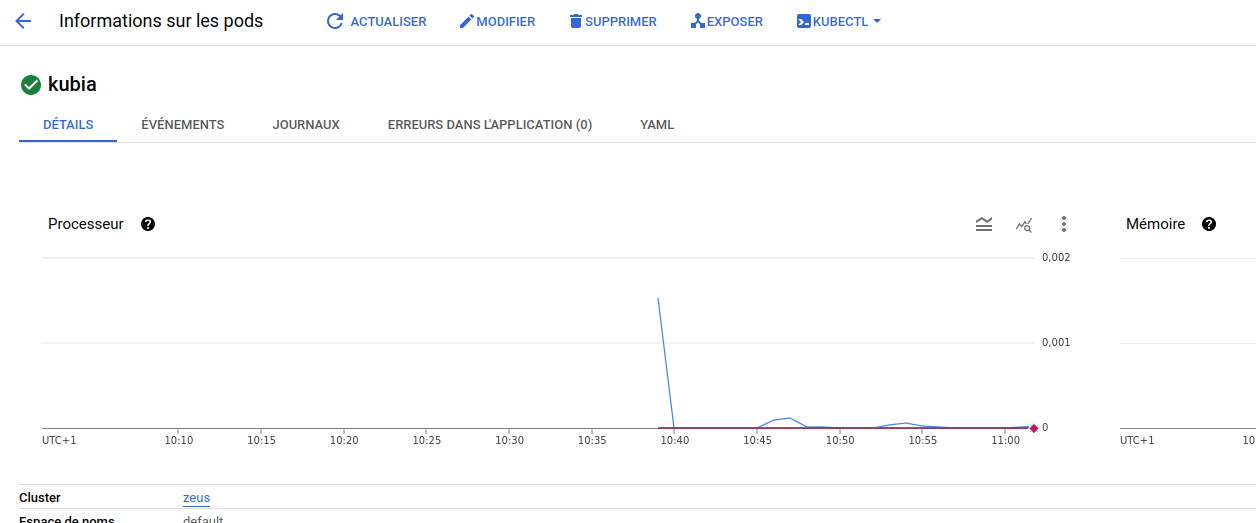
Click on the pod and then on exposer
You should see this interface
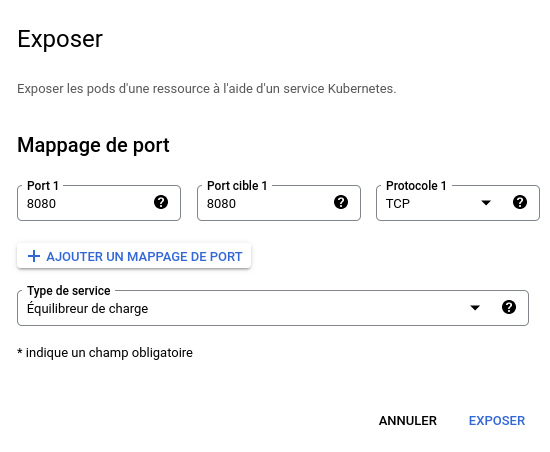
Choose 8080 as the port exposed by the Kubernetes service AND the container (as we used --port=8080). Choose a loadbalancer repartisseur de charge type of service so that it is accessible outside the cluster.
|
Note
|
We could also have used a command line to expose the pod by creating a loadbalancer service with kubectl expose pod
|
> kubectl get services
NAME          TYPE           CLUSTER-IP     EXTERNAL-IP   PORT(S)          AGE
kubernetes    ClusterIP      10.100.0.1     <none>        443/TCP          4d
kubia-5pnz9   LoadBalancer   10.100.6.197   <pending>     8080:30288/TCP   34s
Wait for the service to get an external IP address
> kubectl get services
NAME          TYPE           CLUSTER-IP     EXTERNAL-IP      PORT(S)          AGE
kubernetes    ClusterIP      10.100.0.1     <none>           443/TCP          4d
kubia-5pnz9   LoadBalancer   10.100.6.197   34.173.211.220   8080:30288/TCP   45s
Try to access the kubia pod
> curl 34.173.211.220:8080
You’ve hit kubia
3. A first simple manifest to get a pod
As seen in the course, when handling complex set of resources we do not want to handle everything through command lines with kubectl. It is also difficult to share configurations when directly using command lines. Instead, we declare manifests in YAML files, representing the set of resources we want.
Create a 1-manual-kubia.yaml file with the following content
apiVersion: v1
kind: Pod
metadata:
  name: kubia-manual
spec:
  containers:
  - image: luksa/kubia
    name: kubia
    ports:
    - containerPort: 8080
      protocol: TCP
The above example give a very simple definition of a pod. kind is the type of required resource. You than find two blocks of information
-
metadata: name, namespace, labels, and other information about the pod -
spec: description of the pod’s content (seekubectl explain pod.specor this link for details)
Create resources from a manifest file as follows:
> kubectl create -f 1-manual-kubia.yaml
4. See the details of a pod in YAML
You can see the details of a pod in YAML with the following command:
> kubectl get po kubia-manual -o yaml
You can see that all information specified in the manifest are present but also additional information added by Kubernetes when the resource is created, including the status block.
You can check your pod with the following command:
> kubectl get pods
You can get the logs of your pod with:
> kubectl logs kubia-manual
Kubia server starting...If the pod contains more than one container you can specify the container name:
> kubectl logs kubia-manual -c kubia
5. Port forwarding
Previously we have manually created a loadbalancer service to expose our application outside the Kubernetes cluster. But when debugging it is not necessary to deploy a service, a solution is to do a port forwarding.
> kubectl port-forward kubia-manual 8888:8080
The port forwarder is now running, you can request your app in another terminal:
> curl localhost:8888
You've hit kubia-manual6. Labels and label selector
6.1. Labels
Add labels to the pod description previously defined and let’s call the new manifest 2-kubia-manual-labels.yaml
apiVersion: v1
kind: Pod
metadata:
  name: kubia-manual-v2
  labels:
    creation_method: manual
    env: prod
spec:
  containers:
  - image: luksa/kubia
    name: kubia
    ports:
    - containerPort: 8080
      protocol: TCP
> kubectl create -f 2-kubia-manual-labels.yaml
> kubectl get po kubia-manual-v2 --show-labels
NAME              READY   STATUS    RESTARTS   AGE   LABELS
kubia-manual-v2   1/1     Running   0          80s   creation_method=manual,env=prod
> kubectl get po -L creation_method,env
NAME              READY   STATUS    RESTARTS   AGE   CREATION_METHOD   ENV
kubia-manual      1/1     Running   0          58m
kubia-manual-v2   1/1     Running   0          10m   manual            prod
You can modify the labels associated to pods either with
> kubectl label po kubia-manual creation_method=manual
if the pod does not have any value associated to the given label, or
> kubectl label po kubia-manual-v2 env=debug --overwrite
when the label already exists for the resource (pod).
> kubectl get po -L creation_method,env
NAME              READY   STATUS    RESTARTS   AGE   CREATION_METHOD   ENV
kubia-manual      1/1     Running   0          60m   manual
kubia-manual-v2   1/1     Running   0          12m   manual            debug
6.2. Labels selector
The selector as indicated in the course
> kubectl get po -l creation_method=manual
No resources found in default namespace.> kubectl get po -l env
NAME              READY   STATUS    RESTARTS   AGE
kubia-manual-v2   1/1     Running   0          23m
> kubectl get po -l '!env'
NAME           READY   STATUS    RESTARTS   AGE
kubia-manual   1/1     Running   0          71m
6.3. Use labels and selectors to schedule pods on specific nodes
> kubectl get nodes
kubectl get nodes
NAME                                  STATUS   ROLES    AGE    VERSION
gke-zeus-default-pool-8d102f6f-0w7m   Ready    <none>   4d5h   v1.27.8-gke.1067004
gke-zeus-default-pool-8d102f6f-gbfl   Ready    <none>   4d5h   v1.27.8-gke.1067004
gke-zeus-default-pool-8d102f6f-h721   Ready    <none>   4d5h   v1.27.8-gke.1067004
> kubectl label node gke-zeus-default-pool-8d102f6f-0w7m gpu=true
You can check on the GCP dashboard the new label of the node.
You can then use a label selector to specify constraints on the labels to respect for a given resource. Create a file 3-kubia-gpu.yaml with the following content:
apiVersion: v1
kind: Pod
metadata:
  name: kubia-gpu
spec:
  nodeSelector:
    gpu: "true"
  containers:
  - image: luksa/kubia
    name: kubia
> kubectl create -f 3-kubia-gpu.yaml
You should see in the dashboard that the associated pod has been scheduled to the only node labelled as gpu: true.
7. Namespaces
Labels offer a way to categorize resources.
What if we more strictly want to separate them? Typically if we want to operate on a subgroup only.
In kubernetes you can group objects (resources) into namespace
-
they are not Linux namespaces!
-
it is a scope for object names
-
same names for resources can be used in different namespaces
Let’s list the set of namespaces in your cluster.
> kubectl get ns
NAME              STATUS   AGE
default           Active   4d6h
gmp-public        Active   4d6h
gmp-system        Active   4d6h
kube-node-lease   Active   4d6h
kube-public       Active   4d6h
kube-system       Active   4d6h
We can look at the pods in the namespace kube-system for instance. When not giving the namespace, default is chosen.
> kubectl get po --namespace kube-system
NAME                                             READY   STATUS    RESTARTS   AGE
event-exporter-gke-5b8bcb44f7-26llm              2/2     Running   0          4d6h
fluentbit-gke-5ffm7                              2/2     Running   0          4d6h
fluentbit-gke-cvfqz                              2/2     Running   0          4d6h
fluentbit-gke-z6vc7                              2/2     Running   0          4d6h
gke-metrics-agent-pvglx                          2/2     Running   0          4d6h
gke-metrics-agent-r5lwd                          2/2     Running   0          4d6h
gke-metrics-agent-slrs4                          2/2     Running   0          4d6h
konnectivity-agent-57b85d6b95-4nvjz              1/1     Running   0          4d6h
konnectivity-agent-57b85d6b95-7mm45              1/1     Running   0          4d6h
konnectivity-agent-57b85d6b95-xglpf              1/1     Running   0          4d6h
konnectivity-agent-autoscaler-5d9dbcc6d8-rsd87   1/1     Running   0          4d6h
kube-dns-6f9b8847ff-c9mps                        4/4     Running   0          4d6h
kube-dns-6f9b8847ff-shfdc                        4/4     Running   0          4d6h
kube-dns-autoscaler-84b8db4dc7-z2j25             1/1     Running   0          4d6h
kube-proxy-gke-zeus-default-pool-8d102f6f-0w7m   1/1     Running   0          4d6h
kube-proxy-gke-zeus-default-pool-8d102f6f-gbfl   1/1     Running   0          4d6h
kube-proxy-gke-zeus-default-pool-8d102f6f-h721   1/1     Running   0          4d6h
l7-default-backend-cf7cdc6f6-ftnf6               1/1     Running   0          4d6h
metrics-server-v0.5.2-8fb865474-6j52d            2/2     Running   0          4d6h
pdcsi-node-4d8mw                                 2/2     Running   0          4d6h
pdcsi-node-dcx8q                                 2/2     Running   0          4d6h
pdcsi-node-hxljf                                 2/2     Running   0          4d6h
These are the pods deployed by Kubernetes itself.
> kubectl get po --namespace default
NAME              READY   STATUS    RESTARTS   AGE
kubia-gpu         1/1     Running   0          62m
kubia-manual      1/1     Running   0          141m
kubia-manual-v2   1/1     Running   0          93m
8. Deleting pods
You can delete by name
> kubectl delete po kubia-gpu
You can delete using a label selector
> kubectl delete po -l creation_method=manual
You can delete a whole namespace
> kubectl delete ns custom-namespace
You can delete by using the manifest
> kubectl delete -f 1-kubia-manual.yaml