Turorial - Using GCP GKE with Terraform

1. Objective
We are going to learn how to basically use GCP and GKE with Terraform.
|
Important
|
You need to install the Google Cloud CLI gcloud on your machine.
|
2. Create a project on GCP
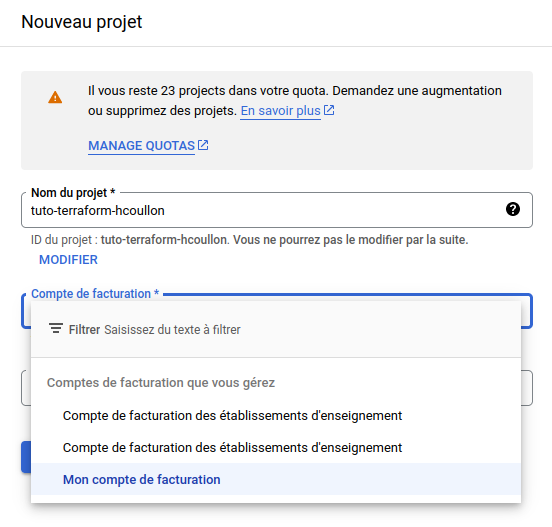
Create a new project on the GCP web interface.


Give a name to the project and associate this project with your educational credits!
2.1. Add a service account
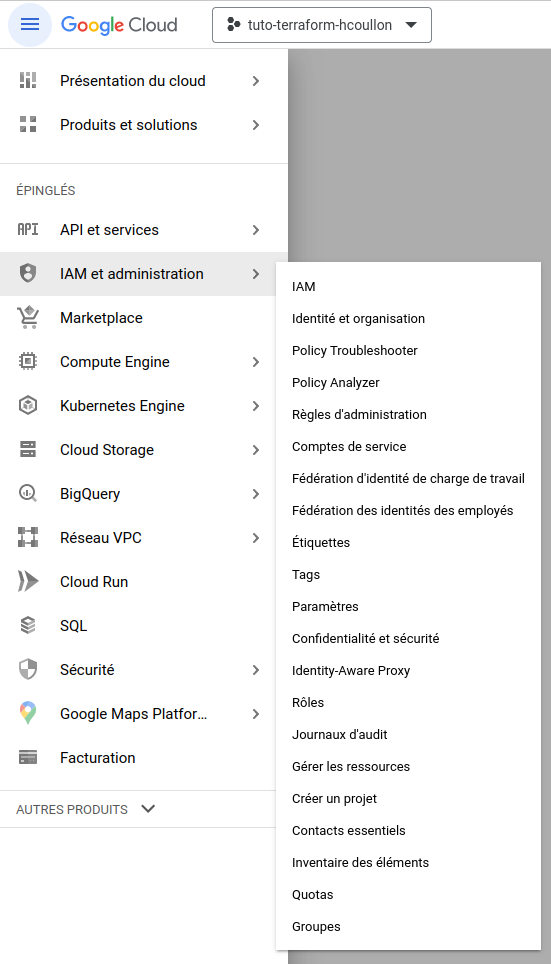
We are going to create a "service account" to be able to interact with GCP outside the web interface. To do this go to the menu on the top left, go to IAM and then Service account.
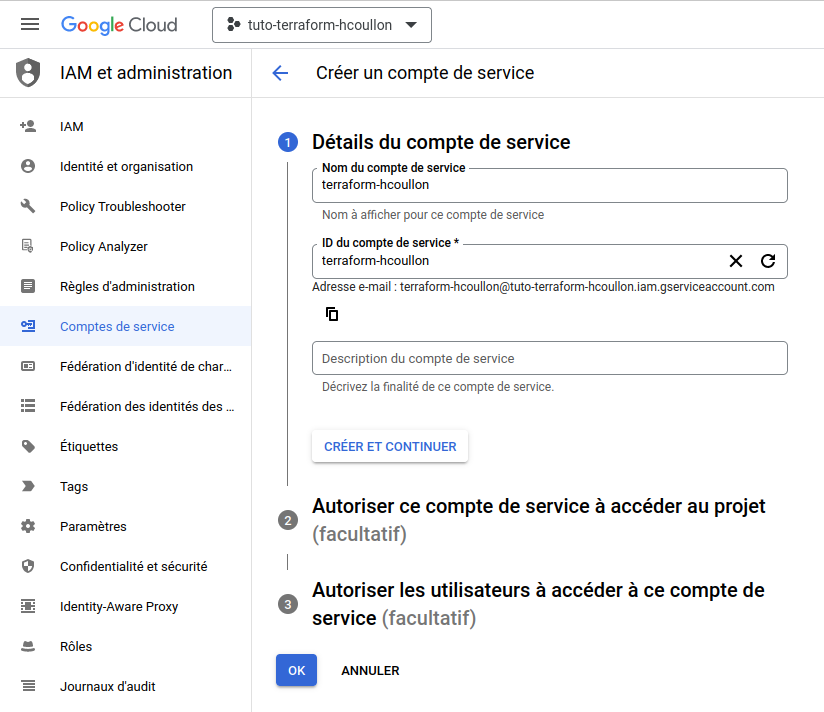
Create a new service account.

Give it a name and continue.
Give the service account the editor role and continue.
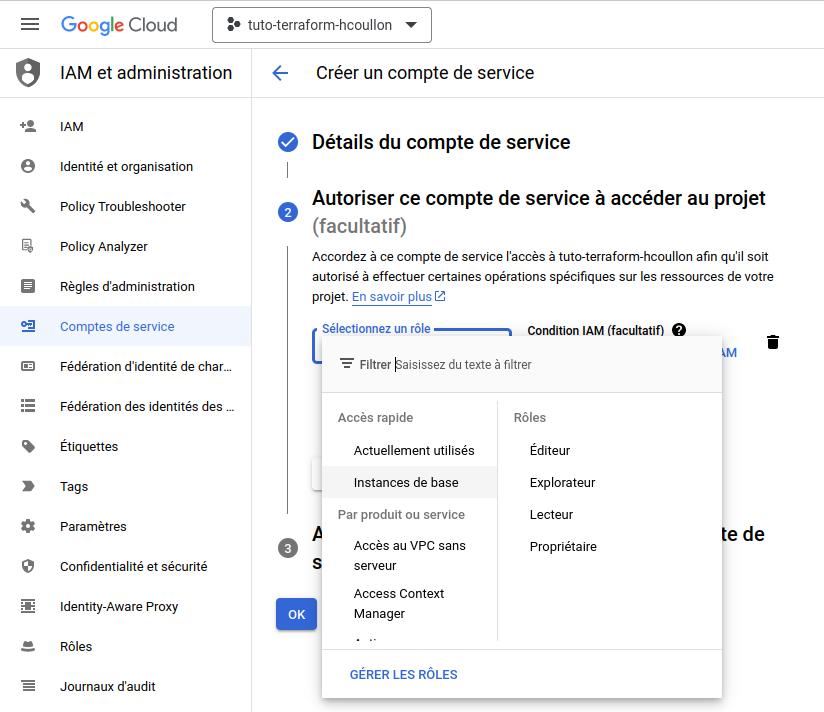
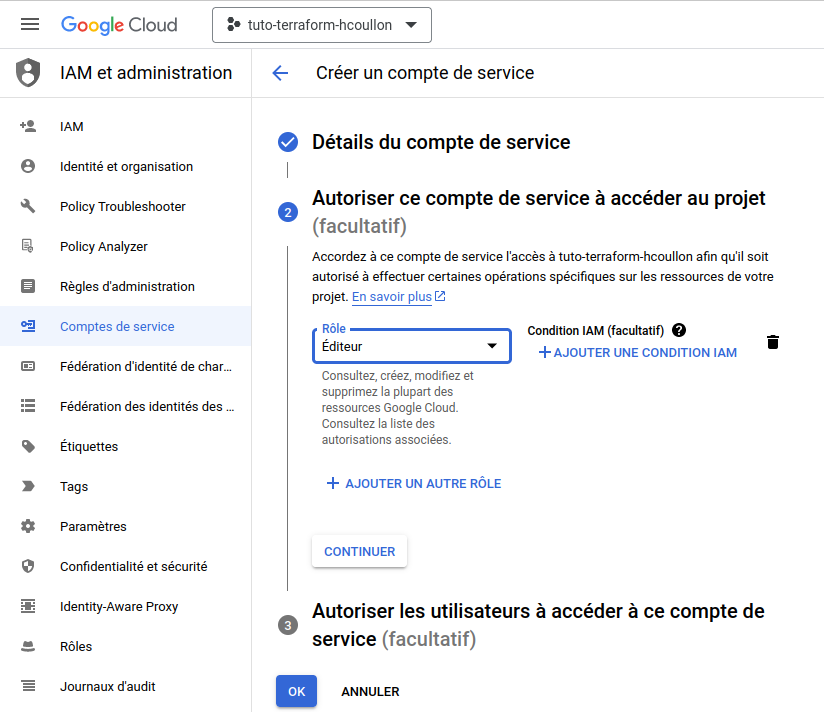
Your service account is created.

2.2. Activate services
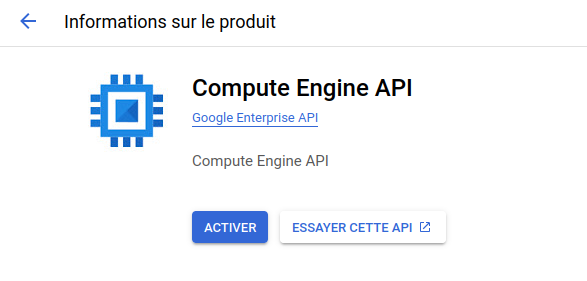
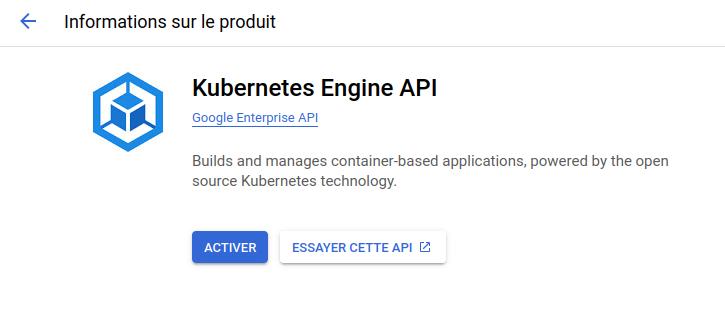
To be able to interact with GCP outside the web interface we also need to activate some services. In this tutorial we need:
-
Compute Engine API
-
Kubernetes Engine API
Go to the APIs library.

Activate the above APIs.
|
Tip
|
As the set of services offered by GCP (and AWS) is very large and sometimes difficult to understand, very often what we do in practice is trying to apply a terraform code and encounter an error indicating that a given service has to be activated. |
3. GCP with Terraform
3.1. Fichier providers.tf
Create a file providers.tf in your working directory. We are going to use this file to declare the providers to use in our tutorial.
terraform {
  required_providers {
    google = {
      source = "hashicorp/google"
      version = "5.6.0"
    }
  }
}
In the above code we indicate to terraform that we want to use the provider hashicorp/google from the registry and that we want to use the version 5.6.0. Details on this provider are given at https://registry.terraform.io/providers/hashicorp/google/latest/docs
We are now going to configure the required provider. To this purpose, in the same file add the following lines:
provider "google" {
  project = "project-id"
  region  = "europe-west9"
  zone    = "europe-west9-a"
}
We create a block to configure the provider google declared as a required provider before. In this block we configure three pieces of information: the identifier of the GCP project that we have created; the region and the zone to use. GCP divide its resources in regions and each region has at least one zone: https://cloud.google.com/compute/docs/regions-zones
3.2. Credentials
We will see one way of handling credentials for the tutorial. Clearly companies probably handle in a much more complex and secure way their credentials.
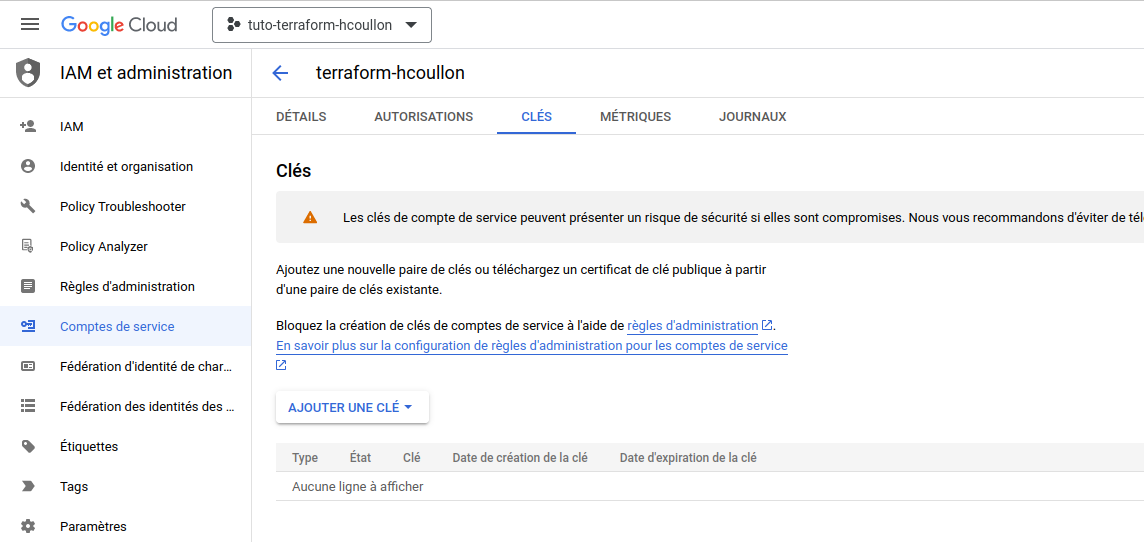
3.2.1. Using a json key
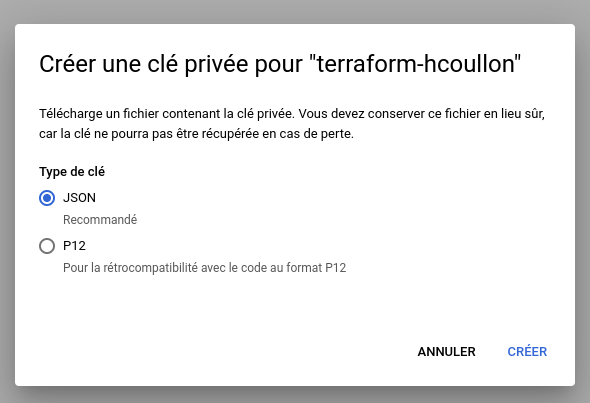
In the GCP interface go to IAM then service account, click on the service account you have created before. Go to the keys tab and create a new key. Select the json format and terminate the creation. A json key file will be downloaded to your laptop. We will use this key file.
Modify the google provider configuration with the following information:
provider "google" {
  project = "project-id"
  region  = "europe-west9"
  zone    = "europe-west9-a"
  credentials = file("downloaded_file.json")
}
The roles granted for this key are the ones defined for the service account (editor in our case).
3.3. Using variables in the provider configuration
As the project name will be used in many different places in this tutorial, using variables is a better practice. We also apply variables for the region and the zone.
Create a terraform.tfvars file with the following content:
project_id = "project-id"
region     = "europe-west9"
zone       = "europe-west9-a"
Declare the following variables at the beginning of the file providers.tf.
variable "project_id" {
  description = "project id"
}

variable "region" {
  description = "region"
}

variable "zone" {
  description = "zone"
}
Modify the configuration of the provider as follows:
provider "google" {
  project = var.project_id
  region  = var.region
  zone = var.zone
  credentials = file("downloaded_file.json")
}
3.4. Create a VPC (virtual private cloud)
To create a VPC we have to create a terraform resource of type google_compute_network. This type is defined by the google provider (see https://registry.terraform.io/providers/hashicorp/google/latest/docs/resources/compute_network)
A virtual private cloud (VPC) is a secure, isolated private cloud hosted within a public cloud. It combines the scalability and convenience of public cloud computing with the data isolation of private cloud computing. GCP VPC provides connectivity for Compute Engine VM instances, Google Kubernetes Engine clusters, App Engine etc.
Create a new file vpc.tf and copy the following content:
resource "google_compute_network" "myvpc" {
  name                    = "${var.project_id}-vpc"
  auto_create_subnetworks = "true"
}
The name of the VPC in GCP will be project_id-vpc. The VPC will automatically create one subnetwork for all regions across a predefined address range.
3.5. Init and apply
Open a terminal in your working directory and execute terraform init. You should see the following output.
Initializing the backend...

Initializing provider plugins...
- Finding hashicorp/google versions matching "5.6.0"...
- Installing hashicorp/google v5.6.0...
- Installed hashicorp/google v5.6.0 (signed by HashiCorp)

Terraform has created a lock file .terraform.lock.hcl to record the provider
selections it made above. Include this file in your version control repository
so that Terraform can guarantee to make the same selections by default when
you run "terraform init" in the future.

Terraform has been successfully initialized!

You may now begin working with Terraform. Try running "terraform plan" to see
any changes that are required for your infrastructure. All Terraform commands
should now work.

If you ever set or change modules or backend configuration for Terraform,
rerun this command to reinitialize your working directory. If you forget, other
commands will detect it and remind you to do so if necessary.
As indicated in the output the init command:
-
downloads the required providers,
-
creates a lock file.
Now that terraform is initialized for your project, execute the command terraform plan in the working directory. This command computes the set of actions to perform on your infrastructure and show the result. When a resource has to be deleted a - is used, when a resource has to be created a + is used. When a resource is deleted and created again -/+ is used.
Terraform used the selected providers to generate the following execution plan. Resource actions are indicated with the following symbols:
  + create

Terraform will perform the following actions:

  # google_compute_network.myvpc will be created
  + resource "google_compute_network" "myvpc" {
      + auto_create_subnetworks                   = true
      + delete_default_routes_on_create           = false
      + gateway_ipv4                              = (known after apply)
      + id                                        = (known after apply)
      + internal_ipv6_range                       = (known after apply)
      + mtu                                       = (known after apply)
      + name                                      = "tuto-terraform-hcoullon-vpc"
      + network_firewall_policy_enforcement_order = "AFTER_CLASSIC_FIREWALL"
      + project                                   = "tuto-terraform-hcoullon"
      + routing_mode                              = (known after apply)
      + self_link                                 = (known after apply)
    }

Plan: 1 to add, 0 to change, 0 to destroy.
In the above output Terraform shows that a VPC will be created. Note that some information will be known only after the apply.
If the plan is ok with your expectations you can run terraform apply. This command will first show you the plan again, and ask you to confirm the changes to apply. Answer yes if everything is ok.
Plan: 1 to add, 0 to change, 0 to destroy.

Do you want to perform these actions?
  Terraform will perform the actions described above.
  Only 'yes' will be accepted to approve.

  Enter a value: yes

google_compute_network.myvpc: Creating...
google_compute_network.myvpc: Still creating... [10s elapsed]
google_compute_network.myvpc: Still creating... [20s elapsed]
google_compute_network.myvpc: Still creating... [30s elapsed]
google_compute_network.myvpc: Still creating... [40s elapsed]
google_compute_network.myvpc: Creation complete after 43s [id=projects/tuto-terraform-hcoullon/global/networks/tuto-terraform-hcoullon-vpc]
3.6. State file
Now that we have applied a first Terraform code with the creation of resources in our infrastructure, the file terraform.tfstate has been created. You can open and parse this file to check the state of your infrastructure.
|
Important
|
It is important to not modify the terraform.tfstate yourself. This file is exclusively created and modified by Terraform. As it will be asked in the practical session it is recommended to store the terraform.tfstate file in a Cloud storage with a lock mechanism to ensure the safety of this file.
|
|
Tip
|
Also note that it may be useful to use the tfstate file to have an overview of available parameters a resource (in addition to the provider documentation).
|
You should see the following elements among others:
{
      "mode": "managed",
      "type": "google_compute_network",
      "name": "myvpc",
      "provider": "provider[\"registry.terraform.io/hashicorp/google\"]",
      "instances": [
        {
          "schema_version": 0,
          "attributes": {
            "auto_create_subnetworks": true,
            "delete_default_routes_on_create": false,
            "description": "",
            "enable_ula_internal_ipv6": false,
            "gateway_ipv4": "",
            "id": "projects/tuto-terraform-hcoullon/global/networks/tuto-terraform-hcoullon-vpc",
            "internal_ipv6_range": "",
            "mtu": 0,
            "name": "tuto-terraform-hcoullon-vpc",
            "network_firewall_policy_enforcement_order": "AFTER_CLASSIC_FIREWALL",
            "project": "tuto-terraform-hcoullon",
            "routing_mode": "REGIONAL",
            "self_link": "https://www.googleapis.com/compute/v1/projects/tuto-terraform-hcoullon/global/networks/tuto-terraform-hcoullon-vpc",
            "timeouts": null
          },
          "sensitive_attributes": [],
          "private": "eyJlMmJmYjczMC1lY2FhLTExZTYtOGY4OC0zNDM2M2JjN2M0YzAiOnsiY3JlYXRlIjoxMjAwMDAwMDAwMDAwLCJkZWxldGUiOjEyMDAwMDAwMDAwMDAsInVwZGF0ZSI6MTIwMDAwMDAwMDAwMH19"
        }
      ]
    }
3.7. Changes
Go to the VPC interface of GCP to see the creation of the VPC. Click on the VPC to see that a subnetwork has been created on all regions. This is not adapted to our project where we want to use a single region.
We apply the following changes to our infrastructure.
resource "google_compute_network" "myvpc" {
  name                    = "${var.project_id}-vpc"
  auto_create_subnetworks = "false"
}
resource "google_compute_subnetwork" "mysubnet" {
name = "${var.project_id}-subnet"
region = var.region
network = google_compute_network.myvpc.name
ip_cidr_range = "10.10.0.0/24"
}We set the auto-create-subnetworks to false and explicitly create a subnetwork by creating a resource of type google_compute_subnetwork to which we give a name (in GCP), a region, our myvpc resource and the address range to apply.
See this link for more details https://registry.terraform.io/providers/hashicorp/google/latest/docs/resources/compute_subnetwork
Execute the command terraform plan:
Terraform used the selected providers to generate the following execution plan. Resource actions are indicated with the following symbols:
  + create
-/+ destroy and then create replacement

Terraform will perform the following actions:

  # google_compute_network.myvpc must be replaced
-/+ resource "google_compute_network" "myvpc" {
      ~ auto_create_subnetworks                   = true -> false # forces replacement
      - enable_ula_internal_ipv6                  = false -> null
      + gateway_ipv4                              = (known after apply)
      ~ id                                        = "projects/tuto-terraform-hcoullon/global/networks/tuto-terraform-hcoullon-vpc" -> (known after apply)
      + internal_ipv6_range                       = (known after apply)
      ~ mtu                                       = 0 -> (known after apply)
        name                                      = "tuto-terraform-hcoullon-vpc"
      ~ routing_mode                              = "REGIONAL" -> (known after apply)
      ~ self_link                                 = "https://www.googleapis.com/compute/v1/projects/tuto-terraform-hcoullon/global/networks/tuto-terraform-hcoullon-vpc" -> (known after apply)
        # (3 unchanged attributes hidden)
    }

  # google_compute_subnetwork.mysubnet will be created
  + resource "google_compute_subnetwork" "mysubnet" {
      + creation_timestamp         = (known after apply)
      + external_ipv6_prefix       = (known after apply)
      + fingerprint                = (known after apply)
      + gateway_address            = (known after apply)
      + id                         = (known after apply)
      + internal_ipv6_prefix       = (known after apply)
      + ip_cidr_range              = "10.10.0.0/24"
      + ipv6_cidr_range            = (known after apply)
      + name                       = "tuto-terraform-hcoullon-subnet"
      + network                    = "tuto-terraform-hcoullon-vpc"
      + private_ip_google_access   = (known after apply)
      + private_ipv6_google_access = (known after apply)
      + project                    = "tuto-terraform-hcoullon"
      + purpose                    = (known after apply)
      + region                     = "europe-west9"
      + secondary_ip_range         = (known after apply)
      + self_link                  = (known after apply)
      + stack_type                 = (known after apply)
    }

Plan: 2 to add, 0 to change, 1 to destroy.
Now execute the command terraform apply and confirm the changes.
Do you want to perform these actions?
  Terraform will perform the actions described above.
  Only 'yes' will be accepted to approve.

  Enter a value: yes

google_compute_network.myvpc: Destroying... [id=projects/tuto-terraform-hcoullon/global/networks/tuto-terraform-hcoullon-vpc]
google_compute_network.myvpc: Still destroying... [id=projects/tuto-terraform-hcoullon/global/networks/tuto-terraform-hcoullon-vpc, 10s elapsed]
google_compute_network.myvpc: Still destroying... [id=projects/tuto-terraform-hcoullon/global/networks/tuto-terraform-hcoullon-vpc, 20s elapsed]
google_compute_network.myvpc: Still destroying... [id=projects/tuto-terraform-hcoullon/global/networks/tuto-terraform-hcoullon-vpc, 30s elapsed]
google_compute_network.myvpc: Still destroying... [id=projects/tuto-terraform-hcoullon/global/networks/tuto-terraform-hcoullon-vpc, 40s elapsed]
google_compute_network.myvpc: Still destroying... [id=projects/tuto-terraform-hcoullon/global/networks/tuto-terraform-hcoullon-vpc, 50s elapsed]
google_compute_network.myvpc: Still destroying... [id=projects/tuto-terraform-hcoullon/global/networks/tuto-terraform-hcoullon-vpc, 1m0s elapsed]
google_compute_network.myvpc: Destruction complete after 1m3s
google_compute_network.myvpc: Creating...
google_compute_network.myvpc: Still creating... [10s elapsed]
google_compute_network.myvpc: Still creating... [20s elapsed]
google_compute_network.myvpc: Creation complete after 22s [id=projects/tuto-terraform-hcoullon/global/networks/tuto-terraform-hcoullon-vpc]
google_compute_subnetwork.mysubnet: Creating...
google_compute_subnetwork.mysubnet: Still creating... [10s elapsed]
google_compute_subnetwork.mysubnet: Still creating... [20s elapsed]
google_compute_subnetwork.mysubnet: Creation complete after 22s [id=projects/tuto-terraform-hcoullon/regions/europe-west9/subnetworks/tuto-terraform-hcoullon-subnet]

Apply complete! Resources: 2 added, 0 changed, 1 destroyed.
Now if you click on the new VPC you will see that the subnetwork is applied to a single region.
3.8. Loop on subnetworks
Let’s imagine that we want to create a set of subnetworks, we may want to use a loop.
Inside a resource, we can have the meta-attribute for_each that takes an object as value.
This results in multiple versions of the resource, one for each subobject.
In the example below, there will be two google_compute_subnetwork resources, one for east, one for west.
Inside the "multi-resource", we then have a special variable called each that have two properties key and value that reference the current subobject.
Here, the subobject value contains (1) the GCP region id and (2) the range of IP addresses of each subnetwork.
We thus create our google_compute_subnetwork resource in the vpc.tf file as follows.
resource "google_compute_subnetwork" "mysubnets" {
  network       = google_compute_network.myvpc.name

  for_each      = {
    east = {
      region        = "europe-north1"
      ip_cidr_range = "10.9.0.0/24"
    }
    west = {
      region        = "europe-west1"
      ip_cidr_range = "10.8.0.0/24"
    }
  }

  name          = "${var.project_id}-subnet-${each.key}"
  region        = each.value.region
  ip_cidr_range = each.value.ip_cidr_range
}
Execute terraform plan and/or terraform apply. When finished you should see three subnetworks, the one previously created in the europe-west9 region, and two new subnetworks in the europe-west1 and europe-north1 regions.
4. GKE with Terraform
4.1. Kubernetes cluster
Now that we have configured the GCP provider and created our VPC and subnet, we will create a GKE Kubernetes Cluster with Terraform.
Create a new file gke.tf and copy the following content:
resource "google_container_cluster" "mycluster" {
  name     = "${var.project_id}-gke"
  location = var.region

  remove_default_node_pool = false
  initial_node_count       = 1

  network    = google_compute_network.myvpc.name
  subnetwork = google_compute_subnetwork.mysubnet.name
}
We create a resource of type google_container_cluster, the name of the cluster within GCP is project_id-gke, the location is the same region we have configured for our provider. A default pool of worker nodes will be created in the Kubernetes cluster with initially a single node. We configure the network and subnetwork with the resources previously created.
Execute the command terraform plan
google_compute_network.myvpc: Refreshing state... [id=projects/tuto-terraform-hcoullon/global/networks/tuto-terraform-hcoullon-vpc]
google_compute_subnetwork.mysubnet: Refreshing state... [id=projects/tuto-terraform-hcoullon/regions/europe-west9/subnetworks/tuto-terraform-hcoullon-subnet]

Terraform used the selected providers to generate the following execution plan. Resource actions are indicated with the following
symbols:
  + create

Terraform will perform the following actions:

  # google_container_cluster.mycluster will be created
  + resource "google_container_cluster" "mycluster" {
      + cluster_ipv4_cidr           = (known after apply)
      + datapath_provider           = (known after apply)
      + default_max_pods_per_node   = (known after apply)
      + deletion_protection         = true
      + enable_intranode_visibility = (known after apply)
      + enable_kubernetes_alpha     = false
      + enable_l4_ilb_subsetting    = false
      + enable_legacy_abac          = false
      + enable_shielded_nodes       = true
      + endpoint                    = (known after apply)
      + id                          = (known after apply)
      + initial_node_count          = 1
      + label_fingerprint           = (known after apply)
      + location                    = "europe-west9"
      + logging_service             = (known after apply)
      + master_version              = (known after apply)
      + monitoring_service          = (known after apply)
      + name                        = "tuto-terraform-hcoullon-gke"
      + network                     = "tuto-terraform-hcoullon-vpc"
      + networking_mode             = (known after apply)
      + node_locations              = (known after apply)
      + node_version                = (known after apply)
      + operation                   = (known after apply)
      + private_ipv6_google_access  = (known after apply)
      + project                     = (known after apply)
      + remove_default_node_pool    = false
      + self_link                   = (known after apply)
      + services_ipv4_cidr          = (known after apply)
      + subnetwork                  = "tuto-terraform-hcoullon-subnet"
      + tpu_ipv4_cidr_block         = (known after apply)
    }

Plan: 1 to add, 0 to change, 0 to destroy.
Then execute terraform apply and confirm the changes
Plan: 1 to add, 0 to change, 0 to destroy.

Do you want to perform these actions?
  Terraform will perform the actions described above.
  Only 'yes' will be accepted to approve.

  Enter a value: yes

google_container_cluster.mycluster: Creating...
google_container_cluster.mycluster: Still creating... [10s elapsed]
google_container_cluster.mycluster: Still creating... [20s elapsed]
google_container_cluster.mycluster: Still creating... [30s elapsed]
google_container_cluster.mycluster: Still creating... [40s elapsed]
google_container_cluster.mycluster: Still creating... [50s elapsed]
google_container_cluster.mycluster: Still creating... [1m0s elapsed]
google_container_cluster.mycluster: Still creating... [1m10s elapsed]
google_container_cluster.mycluster: Still creating... [1m20s elapsed]
google_container_cluster.mycluster: Still creating... [1m30s elapsed]
google_container_cluster.mycluster: Still creating... [1m40s elapsed]
google_container_cluster.mycluster: Still creating... [1m50s elapsed]
google_container_cluster.mycluster: Still creating... [2m0s elapsed]
google_container_cluster.mycluster: Still creating... [2m10s elapsed]
google_container_cluster.mycluster: Still creating... [2m20s elapsed]
google_container_cluster.mycluster: Still creating... [2m30s elapsed]
google_container_cluster.mycluster: Still creating... [2m40s elapsed]
google_container_clust  er.mycluster: Still creating... [2m50s elapsed]
google_container_cluster.mycluster: Still creating... [3m0s elapsed]
google_container_cluster.mycluster: Still creating... [3m10s elapsed]
google_container_cluster.mycluster: Still creating... [3m20s elapsed]
google_container_cluster.mycluster: Still creating... [3m30s elapsed]
google_container_cluster.mycluster: Still creating... [3m40s elapsed]
google_container_cluster.mycluster: Still creating... [3m50s elapsed]
google_container_cluster.mycluster: Still creating... [4m0s elapsed]
google_container_cluster.mycluster: Still creating... [4m10s elapsed]
google_container_cluster.mycluster: Still creating... [4m20s elapsed]
google_container_cluster.mycluster: Still creating... [4m30s elapsed]
google_container_cluster.mycluster: Still creating... [4m40s elapsed]
google_container_cluster.mycluster: Still creating... [4m50s elapsed]
google_container_cluster.mycluster: Still creating... [5m0s elapsed]
google_container_cluster.mycluster: Still creating... [5m10s elapsed]
google_container_cluster.mycluster: Still creating... [5m20s elapsed]
google_container_cluster.mycluster: Still creating... [5m30s elapsed]
google_container_cluster.mycluster: Still creating... [5m40s elapsed]
google_container_cluster.mycluster: Still creating... [5m50s elapsed]
google_container_cluster.mycluster: Creation complete after 5m57s [id=projects/tuto-terraform-hcoullon/locations/europe-west9/clusters/tuto-terraform-hcoullon-gke]
As you can see this takes a bit of time. Going to the GKE interface of GCP you should see your new Kubernetes cluster.
4.2. Outputs
We are going to create a outputs.tf file to specify some outputs to our infrastructure as follows:
output "gcloud_config" {
  value       = {
    project_id = var.project_id
    region     = var.region
    zone       = var.zone
  }
  description = "GCloud Project ID, Region and Zone"
}

output "kubernetes_cluster_name" {
  value       = google_container_cluster.mycluster.name
  description = "GKE Cluster Name"
}

output "kubernetes_cluster_host" {
  value       = google_container_cluster.mycluster.endpoint
  description = "GKE Cluster Host"
}
We declare three outputs
-
one to return the GCP configuration: an object containing three attributes
-
one to return the cluster name
-
one to return the cluster host address.
The two last outputs will be useful to configure the Kubernetes provider.
By executing terraform apply you will know observe the outputs if executed with success.
kubernetes_cluster_host = "34.118.68.222"
kubernetes_cluster_name = "tuto-terraform-398214-gke"
project_id = "tuto-terraform-398214"
The command terraform output will yield again the outputs for the module in the current directory.