Turorial - Using Kubernetes Terraform

1. Objective
In the 1st tutorial, you have deployed two containers (redis and gb-frontend) on Docker.
In the 3rd tutorial, you have deployed a GKE cluster on GCP.
In this tutorial, you will deploy your containers in GKE.
2. Deploy the Application on GKE
At first, copy your previous providers.tf and add the Kubernetes provider.
  kubernetes = {
    source = "hashicorp/kubernetes"
    version = ">= 2.23.0"
  }
Copy also your terraform.tfvars and call terraform init to retrieve the provider.
2.1. Fetch the GKE cluster resource
We will reuse our previous GKE cluster.
Within a Terraform configuration, we can access other Terraform state files.
Create a file gke.tf and copy the following with your adjusted path.
data "terraform_remote_state" "gke" {
  backend = "local"

  config = {
    path = "../tuto-gke/terraform.tfstate"
  }
}

data "google_container_cluster" "my_cluster" {
  name     = data.terraform_remote_state.gke.outputs.kubernetes_cluster_name
  location = var.region
}
Apply your configuration. It should success, showing something like
data.terraform_remote_state.gke: Reading...
data.terraform_remote_state.gke: Read complete after 0s
data.google_container_cluster.my_cluster: Reading...
data.google_container_cluster.my_cluster: Read complete after 6s [id=projects/tuto-terraform-406010/locations/europe-west9/clusters/tuto-terraform-406010-gke]

No changes. Your infrastructure matches the configuration.
2.2. Configure Kubernetes provider
One way to configure Terrsform’s access to the GKE cluster is to get a short-lived token.
In the providers.tf, copy the following;
# Configure kubernetes provider with Oauth2 access token.
# https://registry.terraform.io/providers/hashicorp/google/latest/docs/data-sources/client_config
# This fetches a new token, which will expire in 1 hour.
data "google_client_config" "default" {}

provider "kubernetes" {
  host  = "https://${data.google_container_cluster.my_cluster.endpoint}"
  token = data.google_client_config.default.access_token
  cluster_ca_certificate = base64decode(
    data.google_container_cluster.my_cluster.master_auth[0].cluster_ca_certificate,
  )
}
2.3. Create K8s workloads for Redis
We will create the Kubernetes resources Deployment and Service for both our Redis leader and follower.
In a new file redis-leader.tf, copy the following verbose code.
resource "kubernetes_deployment_v1" "redis-leader" {
  metadata {
    name = "redis-leader"
    labels = {
      App = "redis"
      Tier = "backend"
    }
  }
  spec {
    replicas = 1
    selector {
      match_labels = {
        App = "redis"
      }
    }
    template {
      metadata {
        labels = {
          App = "redis"
          Tier = "backend"
        }
      }
      spec {
        container {
          name  = "leader"
          image = "docker.io/redis:6.0.5"
          resources {
            requests = {
              cpu = "100m"
              memory = "100Mi"
            }
          }
          port {
            container_port = 6379
          }
        }
      }
    }
  }
}

resource "kubernetes_service_v1" "redis-leader" {
  metadata {
    name = "redis-leader"
    labels = {
      App = "redis"
      Tier = "backend"
    }
  }
  spec {
    selector = {
      App = "redis"
      Tier = "backend"
    }
    port {
      port = 6379
      target_port = 6379
    }
  }
}
And in redis-follower, the following.
resource "kubernetes_deployment_v1" "redis-follower" {
  metadata {
    name = "redis-follower"
    labels = {
      App = "redis"
      Tier = "backend"
    }
  }
  spec {
    replicas = 1
    selector {
      match_labels = {
        App = "redis"
      }
    }
    template {
      metadata {
        labels = {
          App = "redis"
          Tier = "backend"
        }
      }
      spec {
        container {
          name  = "follower"
          image = "gcr.io/google_samples/gb-redis-follower:v2"
          resources {
            requests = {
              cpu = "100m"
              memory = "100Mi"
            }
          }
          port {
            container_port = 6379
          }
        }
      }
    }
  }
}

resource "kubernetes_service_v1" "redis-follower" {
  metadata {
    name = "redis-follower"
    labels = {
      App = "redis"
      Tier = "backend"
    }
  }
  spec {
    selector = {
      App = "redis"
      Tier = "backend"
    }
    port {
      port = 6379
    }
  }
}
Apply and check that it was deployed: On the dashboard, in Kubernetes Engine → Workloads
2.4. Create the Frontend Workload
In a new file frontend.tf add the two following resources.
resource "kubernetes_deployment_v1" "gb-frontend" {
  metadata {
    name = "frontend"
  }
  spec {
    replicas = 1
    selector {
      match_labels = {
        App = "guestbook"
        Tier = "frontend"
      }
    }
    template {
      metadata {
        labels = {
          App = "guestbook"
          Tier = "frontend"
        }
      }
      spec {
        container {
          name  = "gb-frontend"
          image = "us-docker.pkg.dev/google-samples/containers/gke/gb-frontend:v5"
          env {
            name = "GET_HOSTS_FROM"
            value = "dns"
          }
          resources {
            requests = {
              cpu = "100m"
              memory = "100Mi"
            }
          }
          port {
            container_port = 80
          }
        }
      }
    }
  }
}

resource "kubernetes_service_v1" "frontend" {
  metadata {
    name = "frontend"
    labels = {
      App = "guestbook"
      Tier = "frontend"
    }
  }
  spec {
    selector = {
      App = "guestbook"
      Tier = "frontend"
    }
    port {
      port = 8080
      target_port = 80
    }
    type = "LoadBalancer"
  }
}
Apply the configuration.
Then, on the dashboard, go to Kubernetes Engine → Gateways, Services and Ingress (Passerelles, services et entrées), then Services.
As in the Kubernetes tutorial from a previous session, we have indicated the LoadBalancer type in the frontend Service in order to allow the public access of the application.
The public IP may take a few minutes to be attributed, but in the end, click on it and make sure the application works.
3. Modules
You may have noticed that in the Kubernetes Deployment and Service resources, there are many repetition of values. We could use locals, but we will abstract more deeply by creating child modules.
More information on modules at https://developer.hashicorp.com/terraform/language/modules.
|
Note
|
Remember, in Terraform, one directory equals one module. And within a module/directory all .tf files are merged regardless of their names.
|
3.1. Module authoring
We will create a module to abstract Deployment resources.
Create a directory deployment/ and in this directory, create variables.tf and copy the following.
variable "metadata_name" {
  type = string
}

variable "label_app" {
  type = string
}

variable "label_tier" {
  type = string
}

variable "container_name" {
  type = string
}

variable "container_image" {
  type = string
}

variable "container_port" {
  type = number
}

variable "resources_requests" {
  type = map(any)
  default = {
    cpu = "100m"
    memory = "100Mi"
  }
}
In deployment/ directory, also create a file deployment.tf with the following content.
resource "kubernetes_deployment_v1" "deplt" {
  metadata {
    name = var.metadata_name
    labels = {
      App = var.label_app
      Tier = var.label_tier
    }
  }
  spec {
    replicas = 1
    selector {
      match_labels = {
        App = var.label_app
      }
    }
    template {
      metadata {
        labels = {
          App = var.label_app
          Tier = var.label_tier
        }
      }
      spec {
        container {
          name  = var.container_name
          image = var.container_image
          resources {
            requests = var.resources_requests
          }
          port {
            container_port = var.container_port
          }
        }
      }
    }
  }
}
Modules usually have output variables, they ought to be declared in a separate file for good practices. But here we are only refactoring plain resources.
|
Important
|
Input variables of modules must be carefully chosen. All values that are not inputs are hardcoded, meaning that callers of a module cannot change them. Here for example, the number of replicas is fixed !
|
3.2. Module usage
In redis-leader.tf and redis-follower.tf resources, replaces the deployments by the following.
module "redis-leader-deployment" {
  source = "./deployment/"

  metadata_name   = "redis-leader"
  label_app       = "redis"
  label_tier      = "backend"
  container_name  = "leader"
  container_image = "docker.io/redis:6.0.5"
  container_port  = 6379
}
and
module "redis-follower-deployment" {
  source = "./deployment/"

  metadata_name   = "redis-follower"
  label_app       = "redis"
  label_tier      = "backend"
  container_name  = "follower"
  container_image = "gcr.io/google_samples/gb-redis-follower:v2"
  container_port  = 6379
}
Before applying, we must do a terraform init to include the newly added module blocks in the lock file.
Indeed, modules are supposed to be reusable configuration.
In such, they can be versioned, uploaded on a registry, etc.
Apply. See that both resources must be completely replaced.
They will have another identifier, namely we can access their attributes with module.redis-leader-deployment.kubernetes_deployment_v1.deplt.
4. Docker Public Registry
In the Terraform-Docker tutorial, we have built and run locally the gb-frontend image.
In the above Kubernetes deployment, we used a publicly available image on Google’s registry servers.
We will change this in order to use our own image that we will build from sources.
It is not immediate because for now, our Kubernetes cluster is running on GCP and automatically pulls the images from a Docker registry.
This registry must be available from the cluster so it cannot be our local machine.
We will use GCP’s Artifact Registry service to store our image.
4.1. Creating the Registry on GCP
Go to Artifact Registry → Repositories and then Create Repository.
Give it a name and a region. Leave everything else by default.
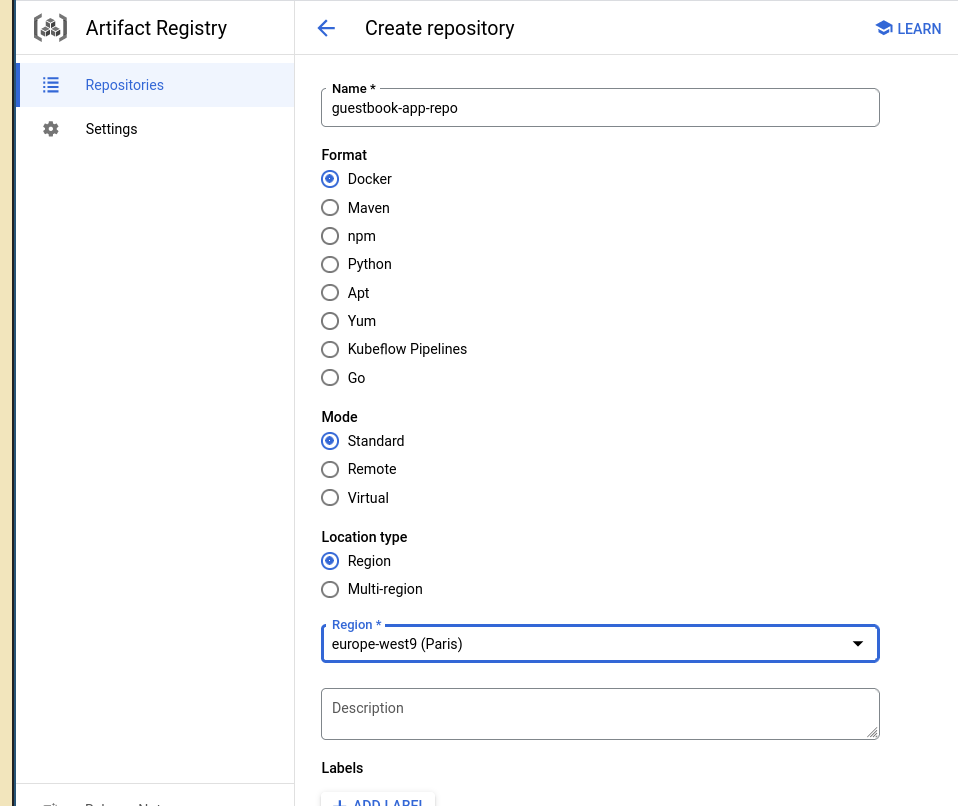
When created, click on the repository and copy the address.

4.2. Declare the Image
Create a new file gb-image.tf and copy the following code that makes use of the Docker Terraform provider.
variable "gb-frontend-source" {
  type = string
  default = "./gb-frontend/"
  description = "Source directory of Guestbook frontend"
}

resource "docker_image" "guestbook-frontend" {
  name = "europe-west9-docker.pkg.dev/tuto-terraform-406010/guestbook-app-repo/gb-frontend"
  build {
    context = var.gb-frontend-source
  }
}

resource "docker_registry_image" "guestbook-frontend" {
  name          = docker_image.guestbook-frontend.name
  keep_remotely = true
}

output "gb-frontend-image-name" {
  value = docker_image.guestbook-frontend.name
  description = "Image name of Guestbook frontend container"
}
Change the docker_image.guestbook-frontend.name attribute to reflect your registry address.
The docker_registry_image resource instructs Terraform to push the image onto the registry.
Finally in frontend.tf, change the image of the frontend service to use the docker_image.guestbook-frontend reference.
4.3. Configure the Docker Provider
We need to configure the Docker provider to access the registry.
Add Docker provider in required_providers of providers.tf.
  docker = {
    source  = "kreuzwerker/docker"
    version = "~> 3.0.2"
  }
Add the provider credentials configuration.
provider "docker" {
registry_auth {
address = "europe-west9-docker.pkg.dev"
username = "oauth2accesstoken"
password = data.google_service_account_access_token.sa.access_token
}
}
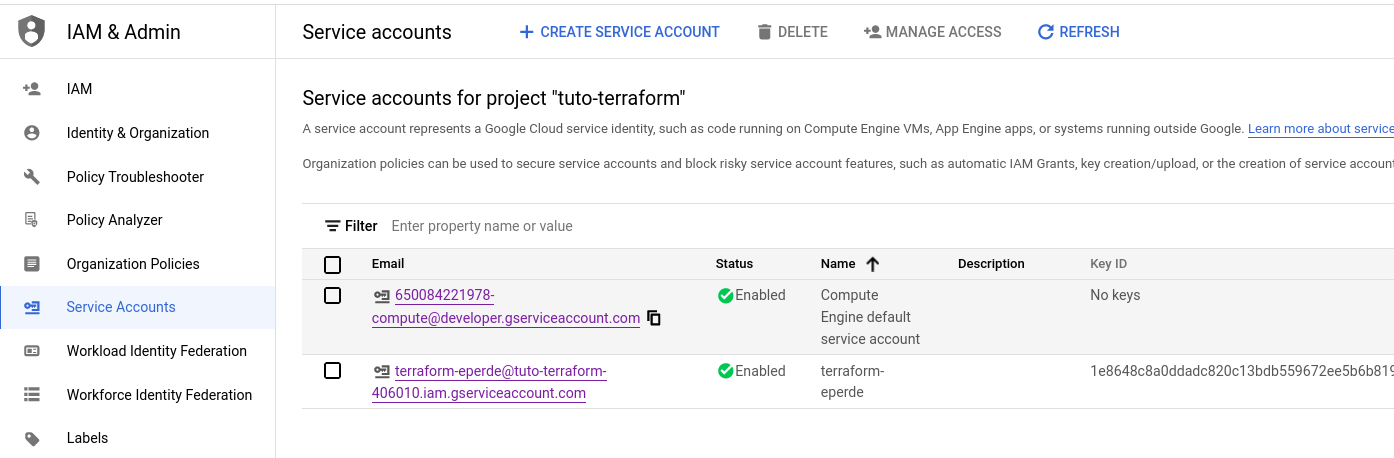
data "google_service_account_access_token" "sa" {
target_service_account = "650084221978-compute@developer.gserviceaccount.com"
scopes = [ "cloud-platform" ]
}
The google_service_account_access_token data source will retrieve a token from the Compute Engine default service account in order to access the registry.
Change the target_service_account to reflect yours. To find your value, on the GCP dashboard, go to IAM then Service Accounts.
Since we requires a new provider, we need to
terraform init -ugprade
4.4. Configure GCP Permissions
Remember that all API calls done by terraform invocations uses the service account you have created in the previous tutorial.
The token from above comes from the Compute Engine default service account.
So we need to tell GCP that our terraform service account can actually get a token from the Compute Engine service account.
Click on the Email link of the default Compute Engine service account.
Then go to Permissions (Autorisations) and click Grand Access (Accorder l’accès).
In the New Principal (Nouveaux comptes principaux) field, add the terraform service account identifier. Autocompletion should work
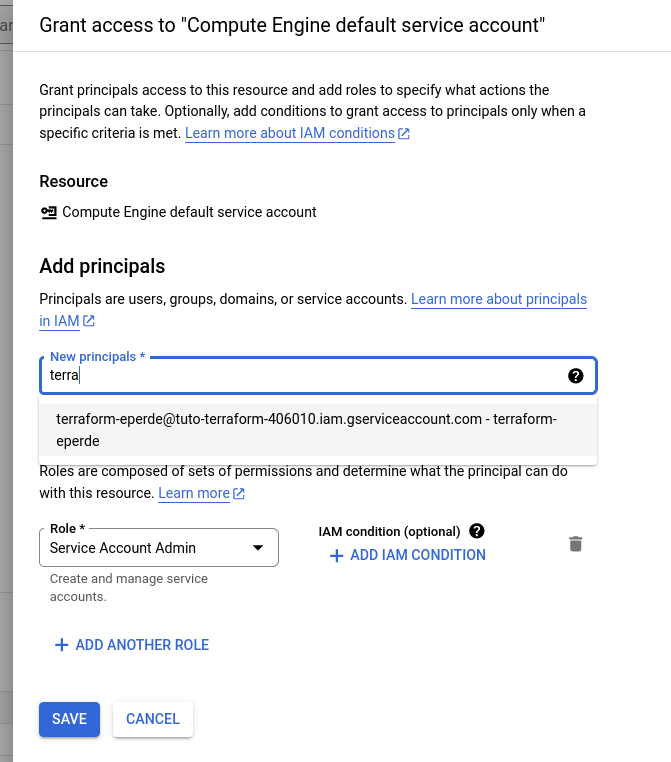
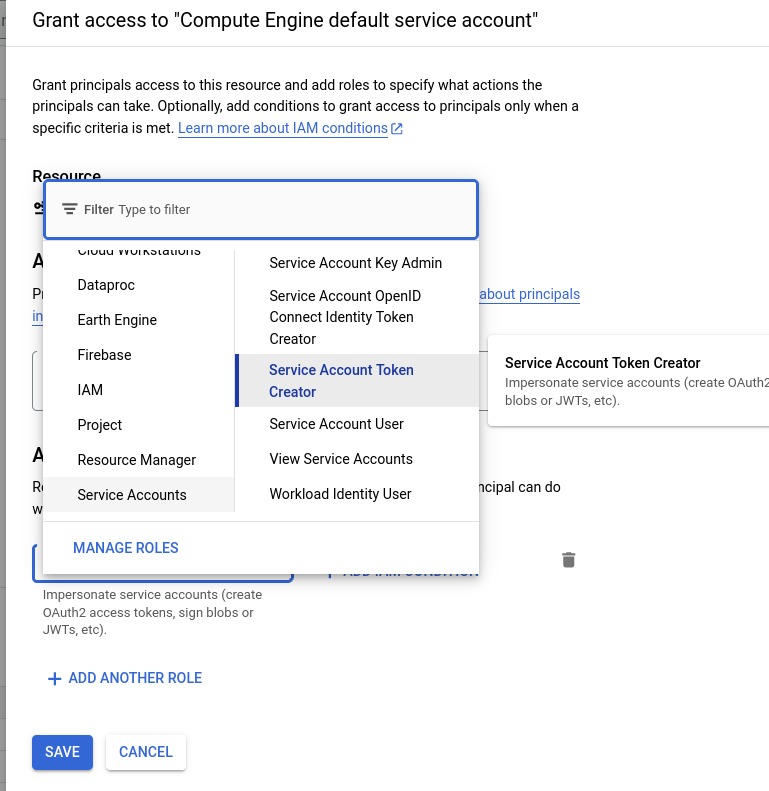
In Role, assign Service Account Token Creator (Créateur de jetons du compte de service)
Apply and verify that the image was pushed in the Artifact Registry.